All lines

Above-ground

Drip irrigation

Underground

Online catalogue


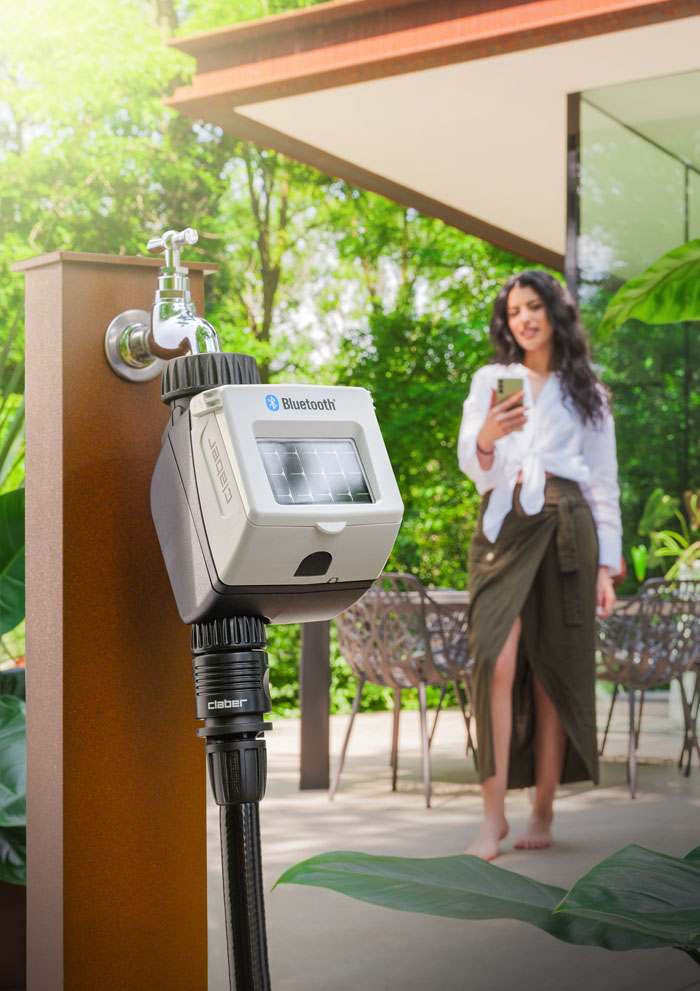
Solar-powered timer operates without batteries and can be controlled solely by smartphone via the myAquaSolar app and Bluetooth® technology.
You must have installed the myAquaSolar app on your smartphone in order to start using the product. The myAquaSolar app is available on Google Play® and the App Store®.
During the communication between the app and the timer, you have to be within a range of 10 m from the timer.
Open the myAquaSolar app. N.B. these operations require the use of Bluetooth®. Make sure it is activated on your smartphone.
From the app’s main screen, press add a timer.
Enter the numerical code (PIN) or scan the QR code.
This information is on the back of the control unit: disconnect it from the timer to access it.
The timer profile will appear on the main page of the app.
N.B. the myAquaSolar app can manage up to 4 timers.
The timer will only be able to water if it has enough charge. To make sure it has the right charge before using it, check the energy level icon.
If the energy level icon is grey, position the timer with the photovoltaic panel exposed to direct sunlight.
The control unit can be disconnected from the timer.
Just the control unit can be positioned in direct sunlight.
Select the timer profile in the app.
It will provide information about the charge status and the time remaining until charging is completed (from 30 to 90 minutes depending on how strong the light is).
Once charging is completed, reconnect the control unit if it had been disconnected. The timer can now be used.
No watering cycle can be set until the FIRST OR NEW START-UP is finished.
Fit the timer to a cold water tap. The spout of the tap should have a 3/4” male thread (if not, use an adaptor).
Screw the clamp collar of the 3/4” female fitting onto the tap.
Caution: tighten the collar using hand pressure only. Do not use wrenches or other tools
Connect the irrigation lines to the timer connector using Quick-Click System fittings or 3/4” threaded fittings.
Do not install the water timer inside valve boxes, below ground level or indoors. Use mains water or have the water filtered. Do not use the water timer with chemicals or liquids other than water. Do not use the water timer with operating pressures lower than 0.5 bar (7.3 psi) or higher than 10 bar (145 psi).
Once the timer is installed, make sure that the photovoltaic panel is pointed in the direction of the open area from which most light comes during the day. This is to ensure it charges correctly.
Remember to open the tap and close the timer cover.
Dual myAquaSolar can be used with the wired Claber Rain Sensor (code 90915). The timer controls the status of the sensor: if the container is full (rainfall of at least 5 mm), watering will not start and any watering cycle in progress will be paused within 1 minute. Manual opening of the valve, either with a button or from the app, is enabled even with the Rain Sensor on.
Disconnect the control unit from the timer. N.B. never remove the control unit while watering is in progress; the flow of water will not stop.
With the help of small pliers, break the plastic plug for preparing the slot of the Rain Sensor cable.
Remove the bridge connector on the timer.
Insert the Rain Sensor connector. The sensor will be active immediately.
Warning: if neither the jumper nor the Rain Sensor connector are connected, the timer will only run manual irrigation programmes and not any automatic irrigation programmes.
To check the sensor status, select the timer profile in the app.
The rain sensor status can be viewed on the top toolbar.
The blue umbrella symbol indicates that the rain sensor is full and automatic watering cycles will not run. If the symbol is blue but the Rain Sensor has not been installed, check that the jumper has been inserted correctly.
Once the FIRST OR NEW START-UP has finished, you can find information about the timer status by selecting the timer profile and looking at the top toolbar.
In order, the icons represent: watering in progress, Bluetooth® signal, energy level, solar radiation and Rain Sensor. Select an icon to find out what it means.
An explanatory page will be shown.
The Bluetooth® signal icon shows whether the timer can be reached (blue) or not (grey).
If the timer cannot be reached it might be necessary to get closer with your smartphone.
If the FIRST OR NEW START-UP is not carried out, the timer might not have enough light or it might not be charged.
If the situation persists and during PAIRING the PIN was entered without using the QR code, it is possible that the wrong code has been entered. Delete the timer and try the PAIRING process again.
The energy level that can be displayed on the timer profile in the app is of particular importance.
The energy level is also shown on the top toolbar after the timer profile has been opened. Selecting the energy level icon gives access to further information.
If the energy level icon is grey, wait for charging to be completed (FIRST OR NEW START-UP).
There are 5 energy levels.
If the energy level goes into energy saving (yellow icon), the timer will still guarantee automatic watering cycles for at least 1 day.
When the energy level is insufficient (red icon), all the functions will be disabled. The date and time are saved in the memory for approximately 16 hours before the timer turns off.
If the timer should run out of charge completely and turn itself off, it might start itself up again after normal exposure to the sun. If it goes off, the timer will lose the date and time setting: watering cycles might then start up in an abnormal fashion. If there is any suspicion that the timer might have been off, bring your smartphone to within 10 m of it to automatically update the date and time and, after checking that the Bluetooth® icon is blue, press the product profile in the app.
To activate/deactivate automatic watering from a timer, press the product profile.
Press the automatic watering toggle button.
If automatic watering is not on, the red symbol will show on the picture of the timer.
Press the timer key once to display the status. The automatic watering on status can be identified on the timer through the flashing blue LED; the automatic watering off status through the flashing red LED.
Tap the timer profile to start programming.
Dual myAquaSolar offers 2 irrigation programmes, A and B, for each line. Select the desired programme.
Press Start time.
Scroll through the hours and minutes until you reach the time you want to start the irrigation cycle at and confirm.
Press Runtime.
Scroll through the hours and minutes until you reach the run time you want and confirm. Watering can be set from 1 minute to 3 hours and 59 minutes.
Then select the days of the week on which you want the irrigation cycle to run. Watering will take place on the days shown in orange.
If you want the programme to be operational immediately, make sure that the programme’s toggle button is On.
Press Save and go back to confirm the settings entered.
Note: the programmes cannot overlap.
For the watering cycles set to take place, make sure that the automatic watering toggle button is On.
Select the programme that you want to modify on the timer profile.
Change the settings you want.
Press Save and go back to make the modifications effective.
Press the timer profile.
Select the manual watering option for the desired line.
Press on the information about the watering run time to set the watering run time.
Scroll through the hours and minutes until you reach the run time you want and confirm. Watering can be set from 1 minute to 3 hours and 59 minutes.
To start watering, press START.
Manual watering can be paused before it is finished by pressing STOP.
Once manual irrigation is complete, the timer returns to the automatic watering active status.
If an automatic watering cycle is scheduled during a manual watering cycle, it will not run.
To activate manual irrigation from the timer, repeatedly press the Dual myAquaSolar button until the LED flashes green or yellow, according to the desired line. In this case, manual irrigation will run for 15 minutes on the chosen line.
To pause it before it is finished, repeatedly press the timer key to set the desired status: automatic watering on (blue LED flashes) or no automatic watering (red LED flashes).
Once manual irrigation is complete, the timer returns to the automatic watering active status.
If an automatic watering cycle is scheduled during a manual watering cycle, it will not run.
You can give a name to the timer or to its irrigation lines from the myAquaSolar app.
Open the myAquaSolar app menu.
Select the timer you want to work on.
To give a name to the timer or the irrigation line, press the modification icon for the desired section.
Enter the text and confirm.
You can delete a timer from the myAquaSolar app. Open the myAquaSolar app menu.
Select the timer you want to work on.
Press Delete timer and confirm.
Now the timer will no longer be displayed in the myAquaSolar app. If you want to pair the timer again, repeat the PAIRING process.
Note: a timer deleted from the app continues the automatic watering cycles set but will no longer appear on the app’s main screen. If you only want to pause the programmed watering cycle, press the automatic watering toggle button.
If the timer behaves anomalously, it can be reset. The reset will NOT cancel the programmes set, nor the date and time, but will only restart the circuit board.
Before carrying out a reset, make sure you are in a well-lit area so that the timer will restart. Never carry out a reset when the timer is watering: the flow of water might not stop.
To reset the timer, hold down its button for 20-30 seconds, until the LED stops flashing.
Press the button again to check the LED switches on.
Clean the filter at the end of each season and check it regularly.
Turn off the tap and loosen the tightening ring nut by turning it clockwise.
Remove the filter.
Rinse the filter clean under running water. After washing, reassemble all parts as before.
At the end of the season, before the winter frosts, disconnect the timer from the tap.
Store the timer in a sheltered place, away from damp, where the temperature does not fall below 3°C.
App Store is a trademark registered by Apple Inc. Android, Google Play and the Google Play logo are trademarks registered by Google LLC. The Bluetooth® brand and logo are registered trademarks owned by Bluetooth SIG, Inc. and are used under licence by Bluetooth SIG, Inc. Claber S.p.A. does not claim any right over the third-party trademarks listed.


